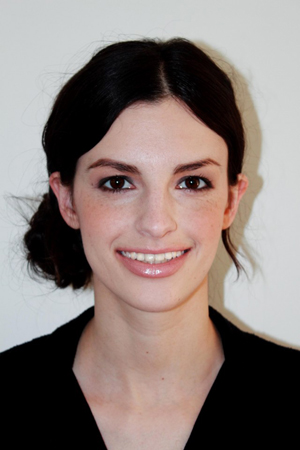
Spring Beauty Trends Tutorial Part 1 : Strong Brows & Side Buns
Reblogged from Pointytoeshowcrew.com
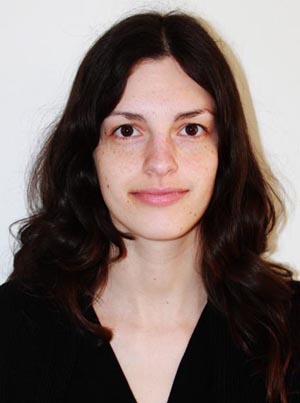
Coveted Cosmetics recently had the wonderful opportunity to team up with the fab ladies from the popular fashion blog team Pointy Toe Shoe Crew for a Spring Beauty Trend Tutorial series! Check out Part 1 of the series – Strong Brows & Side Buns:
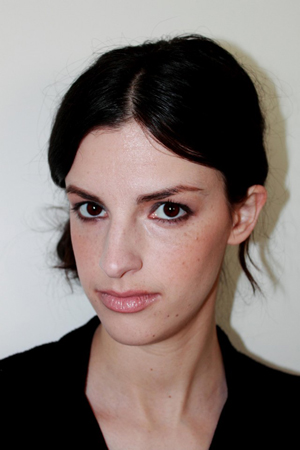
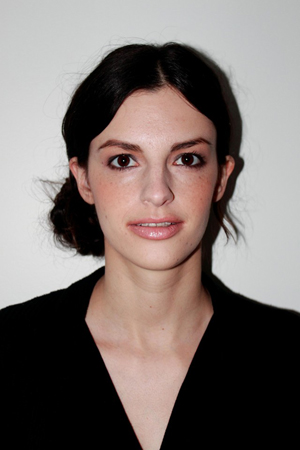
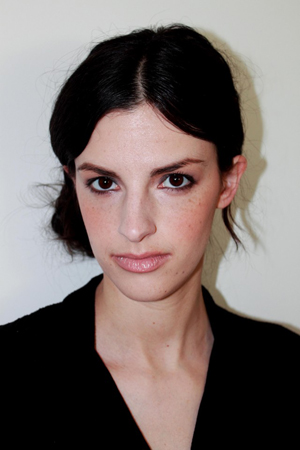
Seen on models at Theyskens’ Theory, Kenzo, Proenza Schouler, Derek Lam (and I could go on…), a nearly-naked eye anchored with a bold brow made a major beauty statement for S/S 2012. It’s a simple way to add some depth to your look without too many products. Paired with a messy bun, it’s a perfect look for a carefree and casual occasion or even a more glam warm-weather event: you won’t have to worry about melting makeup or limp locks with this look!
For the perfect canvas, start with these complexion-prepping steps:
1) Apply a primer, blending evenly over your whole face (try Laura Mercier Foundation Primer).
2) Apply Lioele Beyond Solution bb cream to entire face (available at liliesshop.net; it’s their #2 best-seller!), followed by MakeUp ForEver HD High-Definition foundation.
3) Using concealer, touch up any blemishes or under-eye circles.
4) Using a mixture of dark rose blush (try NARS Dolce Vita) and a peach blush (try MAC Melba), blend colour on the apples of your cheeks and up cheekbones in a V-shape.
5) Use a bronzer to contour cheekbones and your jawline (try MAC Refine Golden bronzer), and finish with a dusting of iridescent powder on your cheekbones (Sandra used MAC Belightful Iridescent powder, or you could try MAC Mineralize Skinfinish in Soft & Gentle).
For the strong-browed look, follow these easy steps:
1) Apply a basic brow pencil in a soft brown colour to make stray hairs stay in place (try Lorac Creamy Brow Pencil in Blonde)
2) Use an eyebrow brush (or a clean mascara wand) to comb out brows, brushing hairs in their natural direction.
3) Use a small brush to fill in brows with brown and grey eyeshadows, such as bareMinerals READY Eyeshadow 2.0 in The Enlightenment.
4) Apply MAC Untitled paint all over eyelids as a base colour, followed by MAC Vanilla eyeshadow all over the lid and under the eyebrows as a highlighter. For added depth, concentrate MAC Satin Taupe eyeshadow at the outer corner of the eyes and blend it inwards.
5) Using a flat, broad shadow brush, smudge a dark brown shadow (like Laura Mercier Coffee Ground eye colour) along top lash line to create a smoky liner look. Do the same along the bottom lash line, and sweep it downward at the outer part of the eye. Clean things up with a taupe eyeliner (like Urban Decay 24/7 Glide-On Eye Pencil in Underground) and a quick sweep of taupe eyeshadow (MAC Satin Taupe will work again nicely!) over the whole eyelid to blend everything together.
6) Curl lashes, apply a couple coats of mascara and apply Coveted Cosmetics False Lashes in Maiden for a natural look. If you’re unsure how to apply false eyelashes on yourself check out these tutorials here
For subtly beautiful lips:
1) Line lips with MAC lipliner in Subculture.
2) Apply MAC lipstick in Brew.
3) Finish with your favourite clear lipgloss!
And there you have it, the first segment of our Spring Beauty Trend Tutorial, stay tuned for the next three segments!
Much love, Madison Blake
All photos copyright KatelynD.


